TAKING A TEMPLATE
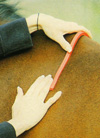
Having established that the front arch of the saddle tree must be exactly the same shape and width as that part of the back where it should be located, i.e. 3-4" behind the top back angle of the scapula (shoulder blade bone), it will therefore be necessary to locate this point before a template can be taken. From the nearside using the left hand, slide your fingers backward over the shoulder blade until your fingers dig in over the edge of the shoulder blade bone, then move your fingers upwards until you locate the back top corner or angle of the bone (fig. A). Then mark a point 3-4" further back. Using a flexicurve mould it carefully over this part of the back in the position where the front arch of the tree should be located (fig. B).
FIG A
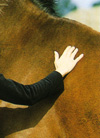
FIG B
Taking a foolscap or larger envelope, lay the flexicuve carefully on the envelope and draw around the underside of the flexicurve*. Repeat the procedure to make certain that the shape is correct.Cut around the shape with scissors and you will then have two copies, one for your saddlers and one to keep as a record. Should your horse change shape, another template will show you whether he/she has either put on or lost condition. Within limits, your saddler should be able to either widen or draw in the arch of the tree to match the new template. Flexicurves can be obtained from W H Smith or an office supply shop.
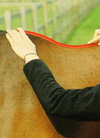
If the horse has a sway or dipped back, mould the flexicurve along the spine as indicated by fig. C and record this so the saddler can stuff the panel accordingly.
However, it should be noted that the shoulder is comprised of both the scapula or blade bone itself plus the cartilage attached to the dorsal or top border of the scapula. While we use the top back angle of the scapula as the point from which to measure, some saddle fitters use the back of the cartilage. While both are acceptable, we believe that the bone provides a more precise position than the cartilage.
FIG C
SADDLE FITTING GUIDE
While nobody expects the average rider to fully comprehend the “dark art” of saddle fitting, it is essential that an understanding of the basic rules are learnt in order that no horse is forced to endure the discomfort of a badly fitting saddle or one that is incorrectly positioned on the back.
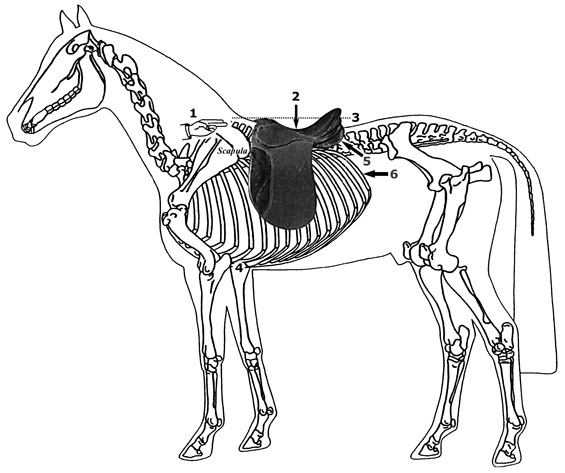
1. It is the most important aspect of saddle fitting that the front arch of the tree is precisely the same shape and width as that part of the back upon which it should sit, i.e. approximately 3-4” behind the back top edge of the scapula or shoulder blade. The commonly held belief that there should be a three fingers gap between the underside of the front arch of the tree and the wither is misleading since with a thoroughbred, or any other high withered type, about two fingers will be adequate. Any more will cause the saddle to sit too low at the cantle end, whereas with a cob that has no withers, a five fingers gap could be appropriate.
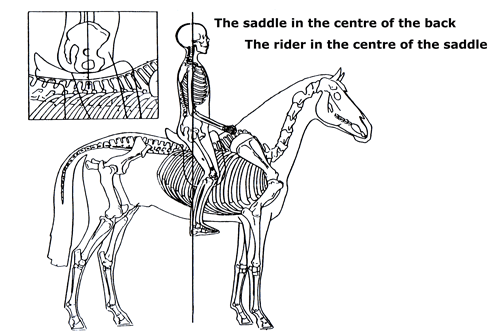
2. The second most important rule is that the deepest part of the seat should be in the centre of the seat so that the rider is forced to sit in the centre of the seat of the saddle. This will mean that the combined weight of the saddle and the rider will be evenly distributed over the whole of the area of the panel from front to back and so avoiding unequal pressure. In this position both saddle and rider will be in balance and the legs will be in the correct position.
3. It is vitally imperative that no part of the panel is allowed to impinge on either shoulder blade or the vertebrae. Therefore the gullet or channel should be sufficiently wide to prevent this happening (not less than three fingers wide). With the saddle in balance the front of the panel will not make contact with the scapula other than very forward cut jumping saddles. Since show jumpers are in the habit of placing their saddles well forward, the front of the panel will of necessity be on top of the shoulder blade. However, since the practice is to use a saddle cloth plus a sheepskin saddle pad the friction between scapula and panel will be cushioned.
4. Since horses roamed the earth for thousands of years before man decided to ride them it is obvious that horses were NOT born with a girth groove, which is nominally located directly behind the elbow. I appreciate that it appears as if the horse was designed with a groove specially located to accept a girth but obviously this was not the case. Therefore “girth groove” must be a misnomer. The correct position for a girth is vertically beneath the saddle, i.e. where it hangs. It should certainly be no less than 5” behind the elbow if discomfort is to be avoided. To loop the girth forward to lay in the so-called “girth groove” will have the effect of pulling the saddle forward.
5. Ideally all panels should be flocked with pure white lambswool and in such a way as to conform to the curvature of the back. Some horses are “sway or dipped” in the back, particularly older ones. Other horses are flat backed, i.e. young ones. Therefore the panel should neither bridge (where it bears either end but not in the middle) nor rock (where the panel is too rounded). In other words it should bear evenly on the back all over in order to avoid pressure points. Of course all saddles must be ridden in so that the panel takes up the shape of the individual horse’s back and in this regard lambswool, being much softer than synthetic flock, will bed in much quicker and better than synthetic and for this reason a saddle should be kept for use on one specific horse only.
6. Ideally the rear of the panel should not extend beyond the last rib, but you will see from the diagram that this is not always possible if the saddle is positioned behind the scapula, which is of course imperative. However providing a saddle that is obviously too big for the horse is not fitted, this must be accepted. We do not consider that an inch or two beyond the last rib will cause any significant problems and is certainly preferable to putting the saddle more forward so that it restricts the free movement of the scapula.
These are the basic rules of fitting a saddle correctly and IN BALANCE (please refer to numbers on the skeletal diagram). Our definition of balance is to position the saddle on the back in such a way that the rider is forced to sit in the centre of the seat of the saddle so that the combined weight of the saddle and rider is evenly distributed over the whole bearing surface so that no pressure points are created. The rider’s legs will also be in the correct position, whereas a saddle position too far forward will cause the rider to sit on the back of the seat, concentrating weight on the back of the panel and placing the rider out of balance. It is remarkable how many saddles are positioned in this way, resulting in bad performance by both horse and rider, plus discomfort and a sore back for the horse.
Hopefully the foregoing will assist the reader to avoid using a saddle that is both poorly fitted and positioned. If in doubt, have the saddle checked by an experienced, qualified saddle fitter. If nothing else, you will avoid the costs of either a vet or the back person, plus discomfort for your horse. A horse will never be a willing partner while suffering discomfort caused by a poorly fitting saddle.
YOUNGSTERS & 3-YEAR-OLDS
We feel it is much better to fit a young horse as soon as possible with a made to measure saddle, and adjust it accordingly as the horse changes shape. Rather than making do with an ill fitting, tempory, second hand or synthetic saddle.
COBS AND PONIES
These are notoriously problematic types to fit, mainly because of width and stability. We specialise in getting the saddle to fit perfectly for both horse and rider, and then keeping it stable. This may require a very soft consistancy of lambswool flocking, that can quickly compress and conform to the shape of your horses back.
